In 2008, Google first released the Android operating system, which immediately won the hearts of gadget lovers. The developers made the new OS free and open source. In addition to this fact, the rapid development of "Android" was due to an extensive policy of support for developers. Thus, hundreds of free programmers rushed into the realm of development.
At that time, many manuals were written on how to create an application for iOS, but serious manuals for Android were few.
The operation of the Android operating system is based on the Linux kernel. And each application runs in a separate virtual machine. Their code for the Android OS is written in the high-level Java programming language. However, if you want to create a product that uses access to devices directly or you need maximum performance, NDK is used - a development kit for C ++.
At the moment, the official Google Play store contains about 2 million software products, since anyone can create a mobile application today.
How to create your own application
A special development environment is used to write program code for the “Android” application. Since the creation of the operating system for programming, Eclipse and IntelliJ IDEA products have been used. To do this, plugins have been released specifically designed to create Android applications. However, after the release of the official development environment from Google - Android Studio, plug-ins ceased to be supported, and programming now takes place mainly in this software package.
In order for Android Studio to work in the system, it must have the Java Development Kit - a free development kit that includes the Java code compiler, libraries, and JRE - runtime. In addition to the JDK, to create an application you will need to download the Android SDK - a set of components for development directly for Android, containing a set of testing and debugging applications. Using these automation tools, writing the first program is as easy as creating a Vkontakte application.
Development environment
First of all, a fresh version of JDK is installed, which can be downloaded from the official Oracle website. Then, Android Studio is installed, available for download from developer.android.com. After installation, the environment will be able to independently download the Android SDK, having led the user through all the necessary steps.
Before creating your application, it’s worth understanding how their download and operation are implemented. After converting the program code into a special bytecode, the environment creates an archive with the extension .APK. He contains:
- application source code located in DEX files;
- additional resources located in the assets folder;
- resources to display;
- the main archive file is AndroidManifest, which contains permissions for applications, version requirements, a list of classes involved in the work, etc.
When the application starts, the Dalvik virtual machine, or the Art system operating from the version of “Android 5.0”, creates a separate process in which executable code is compiled on the fly.
The first steps
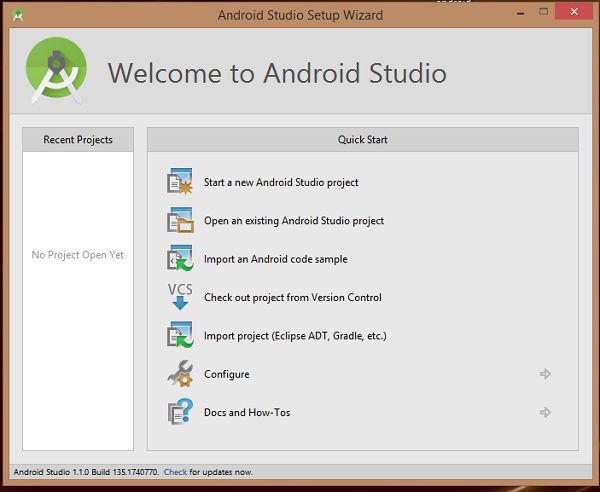
Before creating your application, Android Studio will offer several options for the development of events. You need to choose the first one - create a new Android Studio project.
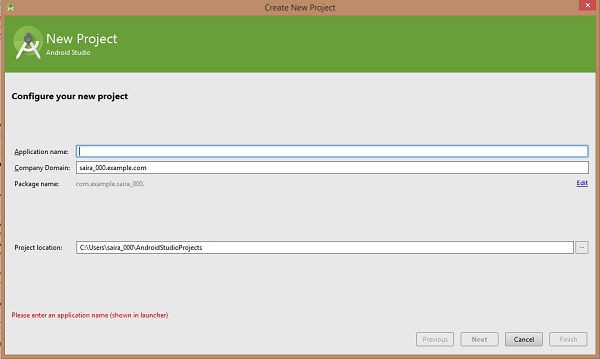
Next, the program will ask you to specify the name of the future application, the company's domain and the physical location of the project on the computer disk.
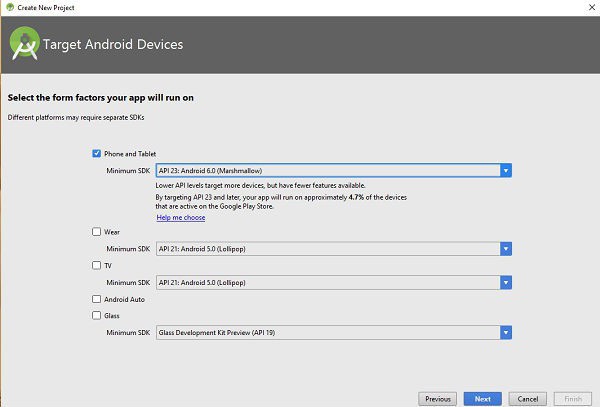
In the next window, you will need to enter the minimum version of Android on which the application can run.When choosing different options, the description below will indicate what percentage of devices with current settings are registered on Google Play. This allows you to choose the largest audience for your product. Since everyone can create new applications, the competition in this area is huge. So, the more coverage, the better.
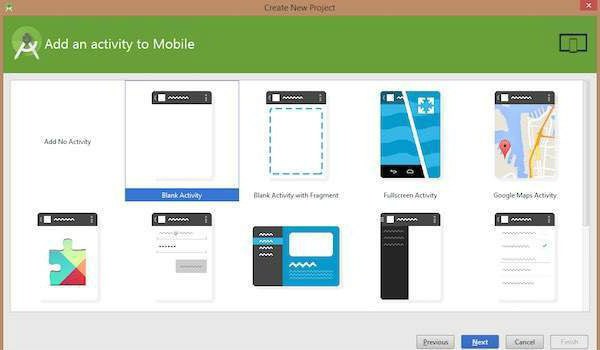
In the next step, the system will introduce several standard layout schemes for the application. They are responsible for the location of the components on the screen. The easiest option to create an application for Android is empty markup. After clicking on the Next button, the program will transfer the developer directly to the code editor.
Programming Anatomy for Android
To create an application yourself, you need to understand the structure of the project. In the left window is a hierarchy of elements of the future program. The root section of the app contains all the subdirectories of the application.
The manifests folder contains the main file of any program for Android - AndroidManifest. It carries a lot of technical information for the application. In most cases, you won’t have to edit it manually, since the SDK most often automatically generates the necessary lines and their parameters.
The java folder contains the main source code. Files with the .java extension are located here. In them, most of the development will take place.
The res folder contains several subfolders with resources. The drawable subdirectory is intended for graphic files necessary for the visual design of the project. Layout contains files with the extension .xml, which determine the characteristics and arrangement of elements on the screen - buttons, text fields, switches, etc. Inside mipmap, icons for the application are copied in several resolutions for optimization on different screen diagonals. It is from this folder that an image will be taken to create an icon on the gadget's desktop. The values directory defines the constant values periodically necessary for the application. For example, color codes, lines for frequently occurring buttons and descriptions, style characteristics.
The Gradle Scripts section is designed to store service information. It is needed for the Gradle project assembly system, which, based on the entered parameters, will collect and compile the project.
Directly code
Before you create an application in VK, you must complete a course of at least superficial training of its API and language. Also here, you will need to pre-tighten your knowledge of Java.
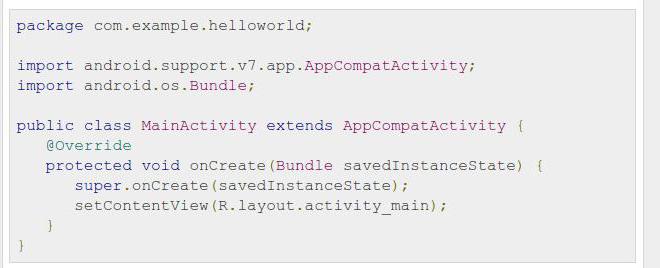
The main class created by default is called MainActivity.java. It is from him that the application will start downloading on the device. Android Studio itself automatically generated the code necessary for the first launch.
Before you create your application, you need to understand the basic principles and understand what is written.
The top line of the package is responsible for the location of the project files. Import shows us which libraries were loaded.
Classes and Methods
The class itself begins with a public access specifier. It serves to differentiate the rights to use classes. The word public means that MainActivity.java is open and can be used from other places in the project. Next comes the class keyword, its name and the most interesting is extends. This term means that the current class inherits from Activity. And so, and receives all its methods and fields.
The body of the class is fenced with braces. Inside them are methods and fields that make up the structure of the entire code.
@Override is an annotation that warns the environment that the method following it will be overridden. This means that you need to take it from the parent class and add changes that are unique to this code. Thus, the inheritance mechanism works in Java.
The annotation is followed by the protected access specifier, which means that this method can be accessed both in this class and from the heirs, and nowhere else.
The void keyword indicates the type of method, or rather, what it should return as a result of the work. This type indicates that it does not return anything, but only performs what is in the body.Methods can have types String, int, double and others, depending on the values.
The name OnCreate is the name of the overridden method from the parent class Activity. To show the execution system that exactly what is needed is called, the super keyword is added to the body with an OnCreate call.
The next line is of no less interest. The setContentView () method “fastens” the markup file to the MainActivity.java class, telling it what the screen of this Activity should look like.
Display
Markup files are responsible for what elements will be located on the screen. They contain strings with parameters that specify constant or variable values. This markup language is made according to the XML specification. Thus, the parameter declaration format is strictly standardized.
To properly create an application for Android, you need to understand a little about the markup. Android Studio itself kindly generated a simple file.
Screen elements
The root container of the markup in this case is RelativeLayout, which means that all the elements inside it will be placed relatively. It contains two parameters - android: layout_width = "match_parent" and android: layout_height = "match_parent". The first is the width of the RelativeLayout container, and the second is its height. The match_parent constant means that both indicators must correspond to the parent, and therefore, the element will expand in full screen.
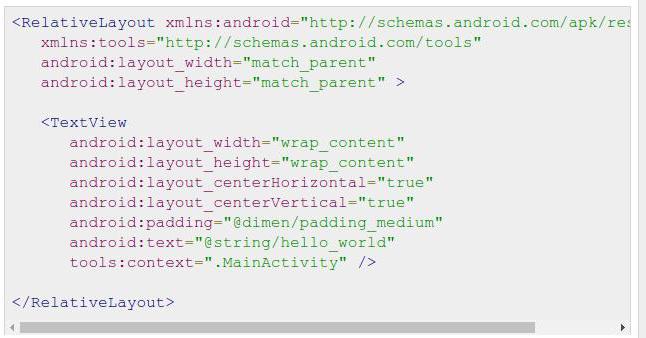
Next, in RelativeLayout, a TextView is embedded, which is nothing more than a regular label.
It has the familiar layout_width and layout_height parameters, the attribute of which is wrap_content, which means around the content. That is, the dimensions of the element will be adjusted to the amount of text.
The following two options indicate the alignment of the text within the element.
The padding parameter takes a digital value to indent the labels from the value resource folder.
The most important parameter for an inscription is a line with text. It can be entered directly into the attribute, but this is called a hardcode and is considered invalid, as it can greatly complicate the localization of the application. It is worth paying attention to the fact that the data that needs to be displayed, namely the text string, is also taken from the strings.xml file in the values folder.
First start
The native emulator of the Android device requires simply supernatural performance. You can run the application on it, or download and install an alternative analogue called Genymotion.
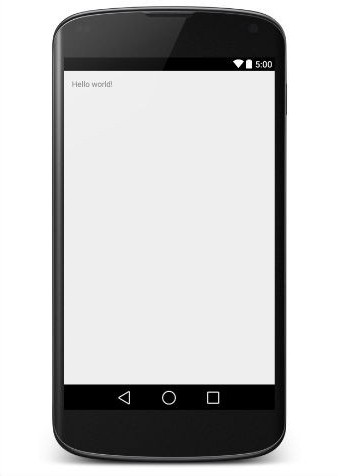
The application is launched by pressing the green Run button on the Android Studio control panel. If no errors during the assembly of the project are found, then the application will start and welcome the world.
findings
Now it became clear how to create a mobile application.
Programming for Android is a bit easier than for iOS. The price of a developer account is lower than that of Apple. All the necessary software is free, and works on many platforms. Before creating an application for iOS, just like in Android, you need to master a programming language. The platform is gaining momentum, new versions are being released, so the development of mobile applications is becoming increasingly important.