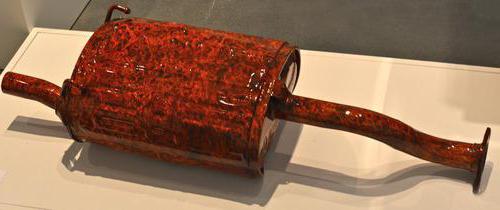
Aquaprint is a separate type of immersion print, which was very popular in Japan in the last century. Its distribution was due to the ability to simulate a variety of surfaces, regardless of the initial shape of the structure, its complexity and texture.
general information
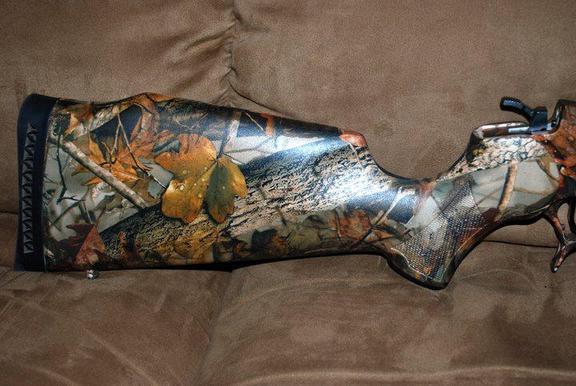
Now the named type of printing is very popular in the field of tuning a car, decorating a yacht or the hulls of various electronic devices.
Few people know that you can do it yourself. To make any thing unique, all you need is to purchase all the necessary tools, materials and have patience.
Surface preparation 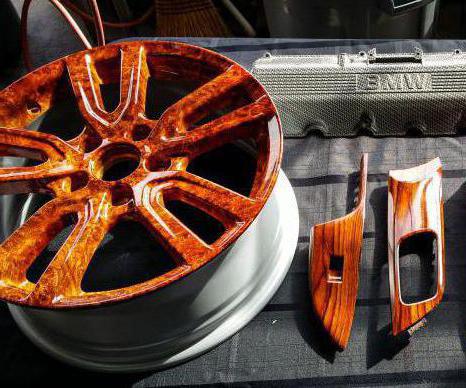
Of course, before you start doing aquaprinting with your own hands at home, you need to carefully prepare the surface on which the drawing will be placed.
- First, the surface must be degreased. Degreasing is a washing of surfaces with a solvent - this is all necessary to completely get rid of the rubberized agent, which covers many decorative parts of the car for safety.
- Do-it-yourself aquaprint is doable, but this is a laborious and complex process, so you need to maximize your ease in drawing a picture. To do this, sanding all surfaces. It is necessary that all existing roughnesses become smooth.
- After sanding, you need to apply a special primer, which can be purchased at a store selling auto goods.
- The final stage of preparation is the priming of surfaces. For these purposes, it is recommended to use ordinary, familiar to each master, automobile soil. When the primer is completely dry, it must be thoroughly sanded.
Base color application
To make a do-it-yourself aquaprint at home, you need to apply a neutral base color to selected surfaces. And to keep it well, it is best to use nitro-based paint. In addition, this paint dries quickly, and in just 15 minutes it will be possible to proceed to the next stage.
The choice of paint directly depends on the desired pattern of aquaprint. With a question about the right choice of base color, it is best to contact a professional, because often in stores several colors are specially mixed to get the desired base.
After applying the paint, you must wait. A do-it-yourself aquaprint requires careful handling, and therefore, surfaces should never be sticky.
Now we need a properly equipped workplace.
Materials
Often people who are interested in how to do an aquaprint with their own hands do not even suspect how much special tools are needed for this.
- Large thermometer (mercury or alcohol is best used).
- Electric boiler.
- Capacity for water. To do this, you can separately see how to make a bathtub for aquaprint with your own hands.
- Compressor.
- Special atomizer.
Film preparation
To start work, it is necessary to pour water into the bathtub or another selected large tank. Using a boiler, the water is heated to 30 degrees. And accurate measurements are made using a thermometer.
The next step is to cut the film of the required size. It is not worth saving, because if the material is not enough, then you just have to throw it away. Small notches are made around the edge of the finished film, which will be approximately 2 cm apart.
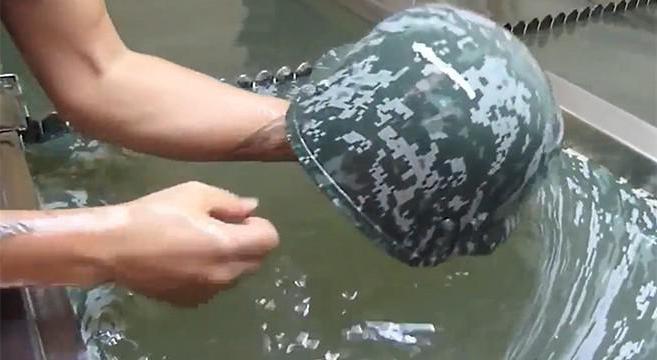
After the film is prepared, it must be immersed on the surface of the water and securely fixed in order to avoid any movements. To correctly determine which side to lay the film, you need to moisten your fingers in water, hold them still dry material and see. Which side the fingers will stick to, that side and it is necessary to immerse the film in water.
The next step is to observe how the edges of the film begin to gradually curl up to the notches made. After all the edges curl, you need to wait about two minutes. In the first half minute, you need to blow out the emerging small bubbles on the surface. If no bubbles appear on the surface, then no action should be taken.
Aquaprinting

After 2 minutes have passed, you need to start applying a special activator. This action must be carried out in zigzag movements, repeating them both vertically and horizontally. After that, it will take time to check again - this time it is enough to wait 10 seconds.
Now you can begin to immerse parts in water. This must be done from a sharp angle. As soon as the part is completely in the water, it must immediately be removed to the surface and left to dry for several minutes.
Treatment
Do-it-yourself aquaprint also involves processing the part after applying the film. First you need to thoroughly wash it from fat. This can be done either in the water where the film was, or in pure water. The most important thing is to observe the established temperature regime, otherwise all work can go down the drain.
Next, dry the part and varnish it to avoid dust particles and smudges. To achieve a deep shine, you will need to varnish the part in 3-4 layers, but the result will be worth the effort. And for an additional effect, you can add a small amount of metallic or pearl to the varnish.