Surely all parents want to keep warm emotional memories of their kids' childhood. But, unfortunately, even the most detailed pictures can not always convey over the years the tremulous magical feeling that mom and dad experience when touching their child’s tiny fingers. In this case, sentimental parents come to the rescue with hand-made casts of children's hands and legs.
Colorful footprints
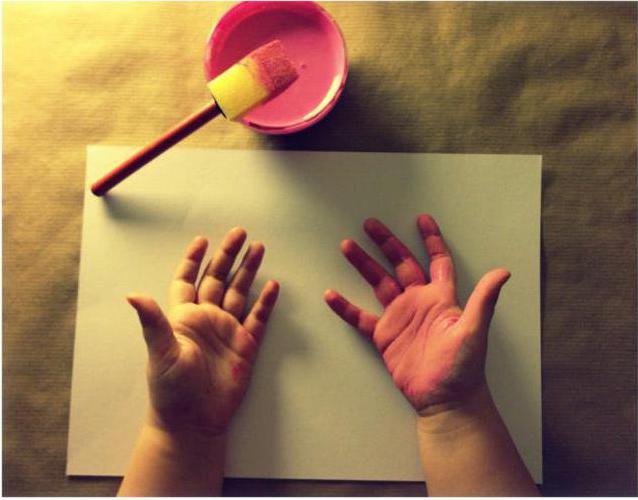
The first thing that comes to mind to perpetuate the arms and legs of a child is to dip them in watercolor or gouache and print them on plain paper or cardboard. Yes, this is not the most original way, but it is inexpensive and fast. To save this sheet for a long time, you can either laminate it or put it in a beautiful subframe.
Plasticine legs
Also, an easy option to make casts of children's hands and feet with your own hands is plasticine. The one that freezes itself in the air, or a special mixture for sculpting, is best suited. The mass should be flattened in the form of a medallion and it is good to print the handle or leg of the baby in it. Be sure to make a hole until the clay has dried so that the “home heirloom” can be hung on a ribbon.
Salt Dough Fingerprint
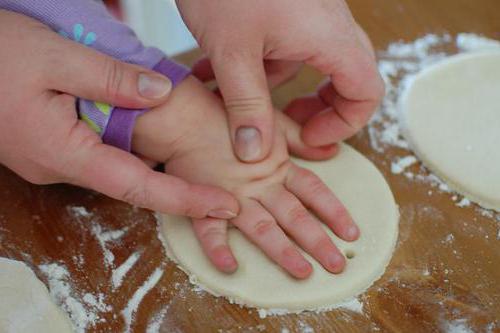
Many of us sculpted “salty” figures in childhood, and now, having become parents, salty dough will help us capture the tiny fingers of our little ones. So, how to make casts of children's pens and legs from salt dough?
Dissolve half a glass of salt in a glass of water and add about a glass of flour (more can be done until the dough sticks off your hands). We divide the mass that we have obtained into 4 identical parts and roll out a rolling pin into flat round wheels a couple of centimeters thick and the size of a child’s handle and leg. With dry, clean palms and feet, the baby is deeply pressed to each piece. If the impression is fuzzy or you don’t like it, you can roll the dough again and repeat the procedure.
When the cast is ready, put the dough for 2-3 weeks to dry. After that, the dough can be painted with acrylics. As you can see, this method is quite painstaking, but the result will be long-lasting and original casts of the hands and legs of a child from salt dough.
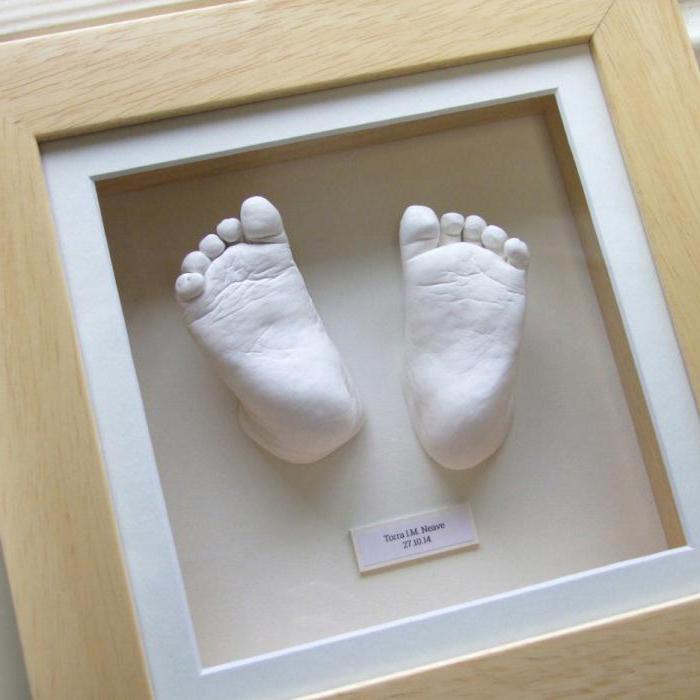
Cast of salted dough and gypsum
An even more scrupulous and unusual way to get fingerprints (casts) of children's hands and feet with your own hands is to plaster them.
To do this, we make the dough according to the recipe described above, and in the same way we form prints, moreover, it is better to make the test 2 times larger so that the print is as deep as possible (2-3 cm in depth). We take gypsum (a set for creativity from special art children's stores is best suited, but it is also possible to build). We dilute it with water in the proportion of 1 glass of gypsum to half a glass of water (it is important to add water to the gypsum, and not vice versa). Add 2-3 tablespoons of PVA glue so that the resulting impression is stronger. Knead everything very quickly and fill it with the dough.
While the mass is not frozen, it is better to wipe all the ugly edges with a cloth, otherwise they will then have to be cut off, than the shape can be damaged. We leave for a day to freeze the mold of the children's handle (legs) with our own hands. Gypsum usually dries quickly, but for everything to work out well, it’s best not to touch it for several hours. Then the finished cast can be taken out of the dough. We grind all the irregularities with sandpaper. You can decorate such prints with acrylic paint or make an interesting collage of children's photos with them. The main thing is to approach the process with imagination!
Sand Casts
Another way to get casts of children's hands and feet with your own hands is to use sand instead of dough. The principle of operation is the same. Pour sand into a deep container, moisten it with water so that it turns into a thick mass, but does not swim in the water and the imprint of the child does not spread. Lower the leg or handle of the baby deeper (1-2 cm) to leave an imprint, and get it. Then we put gypsum into the obtained mold (the proportions are described above) and leave it for several hours to solidify. Then brush off excess sand.
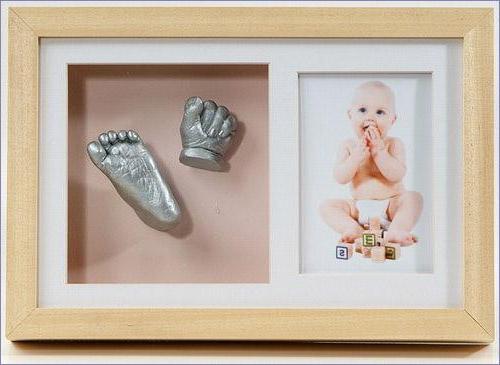
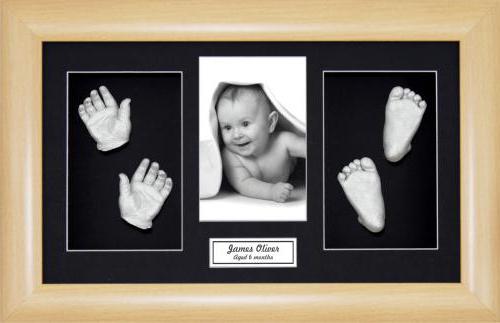
Ready-made casts
Here were some ways to make casts of children's hands and feet with your own hands, but you can also use ready-made kits for creativity. They allow you to create high-quality “pens” and “legs” without using improvised tools, just follow the instructions. There are sets of 2D (only with prints), 3D (palm and foot in full), as well as with the possibility of casting a child’s hand with an adult hand, casts in a frame, on a stand, in an album, with an engraved plate and much more. The only drawback of this method is its high cost, but those who really know a lot about original and memorable gizmos will appreciate it.
Instead of a conclusion
Creating memorabilia, whether it’s photographs or the first homemade handmade, is very important, because children grow up very quickly, and we can’t keep every detail in our memory. In addition to such wonderful casts, my mother’s chest with small treasures can be constantly replenished - with tags from the hospital or photos from the first ultrasound, greeting cards from relatives and friends. Photo albums, a bag with the first lock of hair, the first clothes, the first toy, the first dummy or the first bottle, and when the baby grows up, and the first drawings, the first fakes and many other amazing memorabilia.
Yes, and the child will probably want to get acquainted with those things that surrounded him in his childhood as an adult, and even, perhaps, just remember for a little bit about that wonderful carefree and happy time.